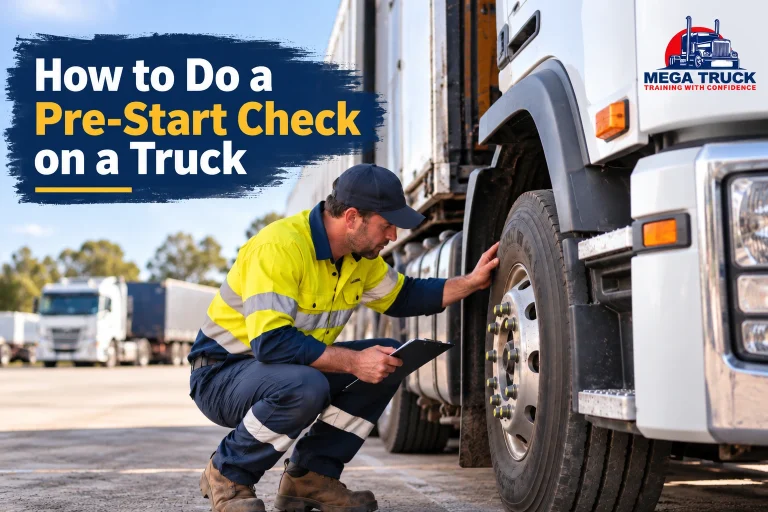
You must’ve heard a popular saying: prevention is better than cure; likewise, a quick check before every trip can save you from unexpected trouble down the road.
For a truck pre-start check, you should cover the exterior, engine bay, tyres, brakes, cab, trailer connections and load. After that, write the results on your truck pre-start checklist.
In this blog, we’ll explain each stage, from brake checks to tyres and fluids. Furthermore, as a Licensed trainer, we’ll also explain what you can do in case of any mishap.
First of all, let’s tell you what you need to do before starting a pre-start check:
Necessary Preparation for a Truck Pre-Start Inspection
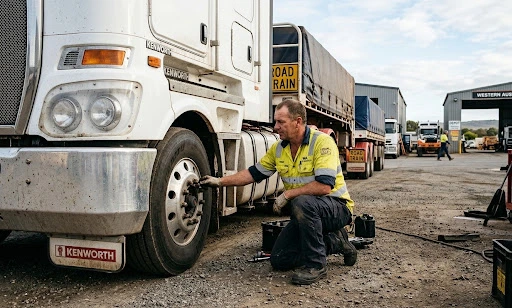
Park on firm, level ground away from traffic. Apply the parking brake, chock the wheels if your workplace requires it, and put on your PPE.
Before you start, read the defect book. If the last driver reported a fault, check whether it was actually fixed or not.
Moreover, never crawl under a truck that isn’t properly secured. For any check that needs the engine running, follow the manufacturer’s handbook.
Pre-Start Check on a Truck: Step-by-Step
1. Walk around the truck and look for any leakage
Start with a slow lap before you open anything. Look at the vehicle posture first. If the truck is low on one corner, it can be an indication of a suspension or airbag problem.
Then look underneath. Look for fresh drips of oil, coolant, fuel or hydraulic fluid. Check steps, mudguards, mudflaps and chassis rails for cracks, rust trails and anything hanging loose.
2. Inspect tyres, wheels and suspension
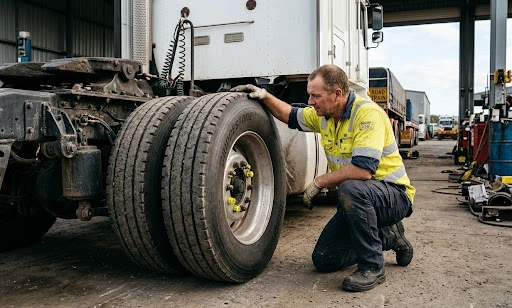
Check every tyre, including the inner duals that are so easy to miss. Look for cuts, bulges, exposed cords, uneven wear and rocks jammed between duals. Check pressures with a gauge against the manufacturer’s spec.
On wheel nuts, watch for rust streaks or shiny marks around the studs, since either can mean a nut has worked loose. If wheel nut indicators are fitted, make sure they all line up.
In WA, tyres on vehicles over 4.5 tonnes GVM need at least 1.5 mm of tread in a continuous band across at least 75% of the width that touches the road. A tyre can pass on tread and still be unsafe because of sidewall damage, so judge the whole tyre.
3. Check lights, mirrors and windscreen
In this step, test headlights, indicators, brake lights, tail lights, reversing lights, clearance lights and reflectors. Having a mate press the brake pedal saves a lot of walking back and forth.
Mirrors should be clean and uncracked. Look for chips or cracks in your primary vision area, and make sure the wipers and washers clear the glass properly.
4. Check engine oil, coolant and items under the bonnet
Check oil, coolant, washer fluid and any other accessible fluids using the manufacturer’s procedure. While the cab is tilted or the bonnet is open, look over belts, hoses, battery terminals and wiring for wear, cracks or rubbing.
Never open a hot coolant cap. Pressurised coolant can cause serious burns.
5. Check brakes, steering and the air system
Brakes and steering deserve your full attention, because a fault here can cost you control of the vehicle.
With the engine running, watch the air pressure build and also make sure the low air warning switches off as pressure rises.
With the engine off, listen for leaks around hoses and fittings. Drain the air tanks if your procedure requires it, and note any oil or heavy moisture that comes out.
Check the steering for excessive free play, and test the park brake in a safe spot.
Remember, never treat one air pressure figure as a universal pass mark. Warning and governor settings differ between makes, so go by the handbook.
6. Complete the cab checks
Adjust your seat and mirrors, then check the seatbelt, horn, wipers, washers, demister and heater. Turn the ignition on and confirm the warning lights come on, then go out after start-up.
Check reversing alarms, cameras and UHF radios where they’re fitted. If a warning light stays on, stop and find out why.
7. Inspect trailer connections and load restraint
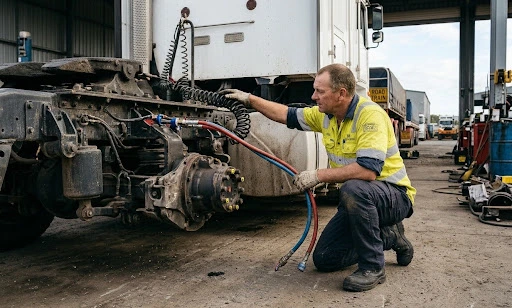
Your inspection covers the whole combination, not just the prime mover. Check:
- Fifth wheel jaws locked, release handle secured, and the turntable greased
- Air lines and electrical cables properly connected, not rubbing or kinked
- Landing legs fully wound up and the handle stowed
- Trailer tyres, wheels, lights and brakes
- Load restraint, straps, chains and any sign the load has shifted
- Safety chains where your trailer type requires them
Take extra care for any dangerous goods, oversize loads.
How Often Should Truck Pre-Drive Inspection be Done?
Before every shift, and again whenever a different driver takes over the vehicle. On long trips, add a quick mid-trip check at rest stops.
Here’s how that works for the components that matter most:
| Component | At every pre-start | On a long run | Send it to the workshop when |
| Brakes and air system | Gauges, warnings, audible leaks, park brake | Listen for leaks; watch for smoke or burning smells at wheel ends | Pedal feel changes, air builds slowly, or leaks keep returning |
| Tyres and wheels | Damage, pressure, tread, nut condition | Lap the truck at every break | Cords show, a bulge appears, or a tyre keeps losing air |
| Engine fluids | Oil, coolant, washer levels, fresh leaks | Watch temperature and oil pressure gauges | Fluid disappears without a visible cause |
| Couplings and load | Jaws, lines, restraints | Recheck restraints after the first leg | Jaws are worn, the kingpin is damaged or straps are frayed |
Daily checks never replace the manufacturer’s service schedule. They catch what happens between services.
How to do a Quick Vehicle Check Before a Long Haul
Speed comes from routine, not from cutting corners.
→ Use the same loop every time, for example cab, left side, rear, right side, front, then engine bay.
→ Carry a small kit: a torch, tyre gauge, tread depth gauge, gloves and a rag.
→ Check the load before you leave, then again after the first leg once everything has settled.
→ Plan your mid-trip checks around your rest breaks so they fit naturally into the run.
Truck Pre-Operational Check Requirements in Western Australia
WA has not commenced the Heavy Vehicle National Law and operates under its own rules. The NHVR’s Guide to creating heavy vehicle daily checks is still a useful framework. Alongside it sit WA’s vehicle standards, your vehicle handbook and your employer’s procedures.
The Department of Transport’s heavy vehicle competency standard lists pre-trip checks, including vehicle posture, as essential, and expects an accurate record of the results.
It matters on test day too. The DoT heavy combination practical driving assessment includes both a pre-trip and a mid-trip vehicle inspection. So if you’re booking an HC licence course in Perth, expect to demonstrate these checks.
What to Do if You Find a Defect During Truck Inspection
- Record it in the defect book or app, noting the component, location and what you saw.
- Take a photo if it will help the workshop understand the problem.
- Tell your supervisor, fleet manager or maintenance team straight away.
- Don’t drive if the defect affects brakes, steering, tyres, wheels or coupling security.
Not every fault carries the same weight. A cracked mudflap goes on the workshop list. A bulging tyre or an air leak you can hear means the truck stays parked until it has been repaired, checked and cleared under your company’s procedure.
Common Problems and Mistakes to Avoid
Faults that commonly turn up, and how to handle them:
- Blown globes → replace them if you’re trained and carry spares; otherwise report them.
- Low tyre pressure → inflate to spec, then watch whether it drops again.
- Leaking air line seals → report them, as they’re usually a quick workshop fix.
- Water in the air tanks → drain them per procedure and report repeat moisture.
- Slack load restraints → re-tension them before moving.
And the habits that cause trouble:
- Checking the truck but forgetting the trailer
- Missing inner dual tyres
- Trusting the dashboard alone
- Signing the sheet without doing the check
- Writing up a defect but never reporting it
Build Safe Driving Habits with Mega Truck Training
At Mega Truck Training (RTO 53025), we teach more than how to pass a test. We teach the habits that keep you, your load and everyone around you safe. Our one-on-one lessons run in dual-control trucks, with training mapped to Department of Transport test routes and focused on real pre-trip checks and practical manoeuvres.
Whether you’re starting with an MR truck licence or upgrading for a new job, our Kelmscott team offers flexible seven-day scheduling to fit your life.
FAQs
Does a pre-start check count as work time in WA?
Yes. Under WA fatigue management guidance for commercial vehicle drivers, work time starts when you begin the pre-start check, not when you start driving.
How long does a truck pre-start check take?
A thorough check usually takes 15 to 20 minutes for a rigid truck, and up to around 30 minutes for a prime mover and trailer.
Is a daily pre-start check the same as a roadworthy inspection?
No. A daily check is the driver’s quick visual inspection. A roadworthy inspection is a detailed examination carried out by an authorised inspector.
Can I use an app for truck pre-start checks?
Yes. Many Australian operators use digital checklists. Records can be kept in any format, as long as the check, any defects and the driver’s sign-off are clearly recorded.
Do WA truck drivers follow NHVR rules when driving interstate?
Yes. The Heavy Vehicle National Law hasn’t commenced in WA, but it applies to WA trucks once they cross into a state or territory where it operates.